Pneumatic cylinder seals and repair is the core of almost all automated production lines, robotic arms and industrial presses. However, the cost of a worn seal is often only a few dollars, it may make the whole production line shut down for several hours. This guide covers everything you need to know: the function of the seal, how to choose the right seal, how to identify faults early, and how to confidently complete the step-by-step repair operation of the pneumatic cylinder.
Whether you are a mechanical engineer designing new system specifications, a maintenance technician investigating slow leaks, or a purchasing manager comparing seal sets, this article is layered according to different needs.
What Are Pneumatic Cylinder Seals and Repair?
Pneumatic cylinder seals are vital components for maintaining pressure and efficiency, and their repair typically involves disassembly, replacement of worn seals using a specific repair kit, and reassembly. Seal failure is a common issue that can cause air leaks and erratic movement, which is often solved with the correct maintenance and seal replacement.
According to the data of the Compressed Air Challenge (U.S. Department of Energy), the loss caused by the leakage of compressed air in industrial facilities is estimated to account for 20 % -30 % of the total output of the compressor, and a considerable part of it comes from the dynamic sealing point inside the pneumatic cylinder. Standardizing the implementation of Pneumatic cylinder seals and repair operations can directly reduce energy costs and unplanned downtime.
5 Types of Pneumatic Cylinder Seals
Understanding the classification system of seals is the basis for any selection or maintenance work.
Pneumatic piston seal – dynamic seal
Pneumatic piston seals are critical components designed to prevent air leakage and maintain pressure within pneumatic cylinders, separating air pressure on either side of a moving piston. They are typically engineered for low friction, high speeds, and long service life, using durable materials like Nitrile Rubber (NBR), polyurethane (e.g., Ultrathan), and PTFE.
Single-acting piston seal: such as U-Cup, Lip Seal, only one-way sealing.
Double-acting piston seal: such as T-Seal, Chevron Pack, two-way seal, suitable for double-acting cylinder.
Wiper seal/Scraper seal
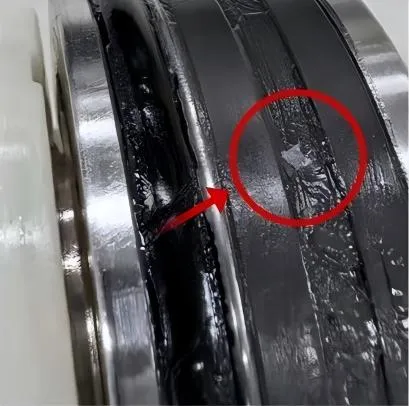
The scraper seal is installed on the outermost side of the piston rod inlet. When the piston rod retracts, the dust, debris and water attached to the rod surface are scraped off to prevent the pollutants from entering the cylinder body with the rod. In the case of more serious environmental pollution, such as steel mills, construction machinery or food processing, once the dust ring fails, rod seals and piston seals wear rate will accelerate dramatically.
Rod seal – dynamic seal
The rod seal is located in the front end cap to prevent compressed air from leaking along the piston rod expansion direction. Working together with a wiper seal, it is the second most common failure component after piston seals in terms of failure frequency.
Buffer seal
Buffer seals are used to absorb pressure spikes and pressure pulses to prevent them from directly impacting the main rod seals. Pressure surges are common in high-cycle or high-speed applications, and cushioning seals are particularly critical.
Static Seal – O ring and gasket
O-ring and flat gasket are used to seal interfaces without relative motion, such as end cap face and port connection. Although the failure frequency of static seals is lower than that of dynamic seals, the O-ring with aging cracking or extrusion at the end cap is a common source of external leakage, and is often misdiagnosed as rod seal failure.
Pneumatic Seal Materials: A Comparison Guide
Seal material determines its temperature range, chemical resistance, friction coefficient and service life. Material selection error is one of the primary causes of premature failure of seals.
| Comparison table of pneumatic seal materials | |||
|---|---|---|---|
| Material | Temp Range | Advantage | Disadvantage |
| NBR (Nitrile) | -30℃ to +100℃ | Low cost, oil resistant | Poor ozone/UV resistance |
| Polyurethane(PU) | -40℃ to +90℃ | High wear resistance | Hydrolysis in howater |
| PTFE | -200℃ to +260℃ | Near-zero friction,chemical inert | Low elasticity |
| EPDM | -50℃ to +150℃ | Excellent ozone/steam resistance | Poor oil resistance |
| FKM(Viton) | -20℃ to +200℃ | Superior chemical & heat resistance | High cost |
ANRUK team’s professional tips: for most standard factory pneumatic applications using lubricated clean air, nitrile butadiene rubber (NBR) or polyurethane (PU) piston seals have the best cost performance. PTFE for food-grade or pharmaceutical equipment; change to FKM in high-temperature or chemically corrosive environments.
How Do I Choose the Right Pneumatic Seal for My Cylinder?
Choosing the right pneumatic seal requires evaluating the specific operating conditions of your cylinder, as there is no single “best” seal for all applications. Key factors include the seal’s function and type, the operating environment, and material compatibility.
Step 1 – Confirm the operating pressure and speed
The working pressure of most pneumatic cylinders is between 4-10 bar (60-150 PSI). A higher pressure requires a higher durometer and a stronger extrusion resistance seal geometry, such as an O-ring combination with a back-up Ring. High-speed cylinders (piston speeds > 0.5 m/s) require low-friction PTFE coatings or elastic lip seals.
Step 2 – Know operating temperature and media
Confirm the operating temperature range and whether the air supply is lubricated or dry. Dry air will accelerate the wear of lip seals; the self-lubricating PTFE material is preferred in the absence of an inline lubricator. If the process involves contact with condensed water, steam or any chemical, it shall be confirmed individually by the supplier’s chemical resistance chart.
Step 3 – Accurately measure the bore diameter and rod diameter of the cylinder
Even a measurement error of 0.1 mm may cause the seal to leak immediately or produce excessive friction. Please use a calibrated bore gauge instead of a tape measure. Need to record:
- Bore diameter: used to select piston seals
- Rod diameter: used to select rod seals and scraping rings
- Groove width and depth: used to select O-rings and buffer seals
Step 4 – Decide to use OEM seal kit or aftermarket seal kit
OEM kits (from SMC, Festo, Parker, ANRUK and other cylinder manufacturers) can ensure the consistency of size and material, but the price is higher. Aftermarket kits from reputable suppliers typically save 40 % – 70 % in cost, but must be purchased from a certified reseller. In high cycle frequency or safety-critical applications, unbranded kits with unknown sources should be avoided.
Step 5 – Confirm the Seal Profile Geometry
In addition to the material, the cross-sectional profile of the seal is crucial. Common cross-section types include:
- U-ring/lip seal: excellent dynamic sealing performance and low friction
- T-seal: two-way seal, seal groove space is compact
- O-ring + back-up ring: suitable for static sealing and medium dynamic sealing occasions
- Chevron/v-ring stack: adjustable preload for high-pressure applications in heavy industry
5 Signs Your Pneumatic Cylinder Seals Need Replacing
Early diagnosis can avoid the upgrade of the seal replacement operation to the whole cylinder scrap. Note the following signals:
- Visible external air leakage: there is obvious airflow sound at the outlet of the piston rod or near the end cover air port.
- Cylinder output force or speed drop: internal bypass leakage caused by piston seal wear.
- Cylinder drift under load: piston seals have been unable to maintain the piston position.
- Excessive lubricant consumption: the seal scrapes the lubricant out of the cylinder at a faster rate than normal.
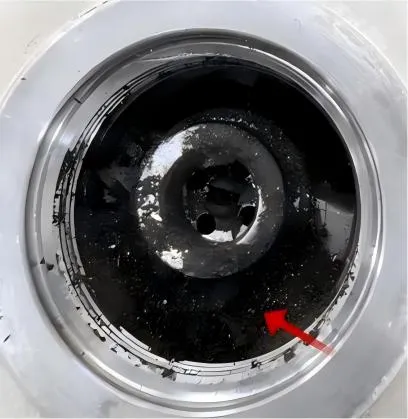
- Rod surface scoring or pitting: the scraping ring fails, and the abrasive pollutants enter the rod surface and are then brought into the inner wall of the cylinder.
How to Repair a Pneumatic Cylinder: 7 Proven Steps
Pneumatic cylinder repair is a systematic operation. The hasty handling of any step, especially the installation of seals, is the primary cause of re-failure within weeks of repair.
Step 1 – Isolate and depressurize
Turn off the compressed air supply and manually cycle the cylinder to exhaust the residual pressure. Lockout/Tagout (LOTO) procedures are performed according to OSHA 29 CFR 1910.147 prior to disassembly.
Step 2 – Remove the cylinder from the machine
Disconnect the rod end connector or mount bracket, and then remove the air port joint. All hardware components are classified and marked for easy reloading.
Step 3 – Disassemble the cylinder
Remove the front and rear end caps (usually secured by tie rod bolts or thread locks). Carefully pull out the piston rod assembly to avoid scratching the inner wall of the cylinder.
Step 4 – Inspect all components
Bore wall: scratches with a depth of more than 0.05 mm mean that the cylinder needs to be replaced.

Piston rod: check the scratches, pitting and chrome plating off
End cap sealing face: check whether there is corrosion or damage to the O-ring groove
Step 5 – Remove old seals and clean
Remove old seals from the seal groove using a plastic or wood picker. The use of metal screwdriver is strictly prohibited, which will damage the edge of the sealing groove. Clean all parts with lint-free cloth dipped in Isopropyl alcohol to thoroughly remove old grease residues.
Step 6 – Install new seals
– New seals were lightly coated with compatible grease. For example, Parker O-lube was used for NBR, and silicone grease was used for EPDM/PTFE.
– When the lip seal is installed, the lip is facing the Pressure Source Side.
– Rolling or twisting seals are strictly prohibited during installation: Taper Cone Installation Tool is used when conditions permit.
– Before continuing the next step, it is confirmed that each seal falls completely and evenly into the sealing groove.
Step 7 – Reassemble, test and cycle
Reassemble in reverse order according to disassembly. Tie rod nut is uniformly torqued by cross-pattern Torque to avoid end cap distortion. When the air supply is re-connected, the initial pressure is controlled at 2-3 bar. The cylinder is completely cycled 10-15 times to put the new pneumatic piston seal in place and return to normal operating pressure. Check for leaks with soapy water or a special leak detection spray.
Industry Applications: Which Seals Are Used Where?
| Table of seals in industry application | ||
|---|---|---|
| Industry | Typical Cylinder Use | Recommended Seal Material |
| Automotive Manufacturing | Clamping, pressing, welding fixtures | Polyurethane piston seals, NBR rod seals |
| Food & Beverage | Portioning, filling, packaging | FDA-compliant PTFE or EPDM |
| Pharmaceutical | Sterile filling, clean room automation | PTFE, electropolished bore |
| Steel & Heavy Industry | High-force presses,scale lifting | FKM seals, PTFE-coated back-uprings |
| Semiconductor/Electronics | Precision positioning | Low-particulate PTFE, dry-running seals |
| Construction Equipment | Attachments, boom control | High-durometer PU, heat-stabilized NBR |
Common Mistakes to Avoid in Pneumatic Cylinder Seal Repair
Installing seals dry: always apply grease; even for self-lubricating PTFE seals, applying a thin layer of grease during installation prevents assembly damage
Reusing old O-rings: the cost of static seals is very low, and they are always replaced during overhaul and cannot be reused
Ignoring the bore surface condition: installing a new seal on the scratched inner wall will fail again within a few days
Excessive tightening of tie bolts: resulting in cylinder deformation (Bore Distortion), piston seals produce point contact wear
Misidentifying seal orientation: asymmetric lip seal will cause pressure bypass immediately after misidentifying
Conclusion
Pneumatic cylinder seals and repair is a core skill that can continuously generate returns in terms of equipment reliability, energy consumption management, and equipment life. The core principles are summarized as follows:
- 5 types of seals are mastered: piston seal, rod seal, wiper seal, buffer seal, static seal.
- Pneumatic seal material is selected based on temperature, medium, speed and pressure, rather than price alone
- Follow the 5 steps selection process: pressure → medium → size → OEM vs. aftermarket → cross-section type
- Strict implementation of the 7 steps maintenance procedures, seal direction and lubrication is the focus
- Before installing new seals, be sure to check the inner wall of the cylinder and the state of the piston rod – the damaged surface of the new seal is bound to fail prematurely.
FAQ
What is the normal service life of pneumatic cylinder seals?
The typical life of high-quality NBR or PU seals is 5-10 million cycles under clean lubrication, medium pressure (≤8 bar) and medium cycle frequency (≤1 Hz). In high-speed, high-frequency or polluted environments, the service life may be less than 1 million cycles.
Can different material seals be mixed in the same cylinder?
Yes, this is common practice. For example, polyurethane (PU) is used for piston seals to obtain wear resistance, PTFE is used for rod seals to obtain low friction characteristics, and nitrile rubber (NBR) O-ring is used for static sealing interfaces. However, it must be confirmed that all materials are compatible with the same grease (lubricant compatibility).
What is the difference between pneumatic and air cylinder seals?
Pneumatic seals and air cylinder seals are the same product; the terms “air cylinder” and”pneumatic cylinder” are used interchangeably because pneumatic systems use compressed air as their working medium.
Can I replace pneumatic cylinder seals myself?
Yes, most DIYers can replace pneumatic cylinder seals themselves in 30-90 minutes. Seal kits cost $15-$80 vs $200+ for a new cylinder. Work cleanly, and check seal direction.
What tools do I need to repair a pneumatic cylinder?
Essential tools include seal pick, seal installation kit, wrenches, rubber mallet, lint-free rags, isopropyl alcohol, torque wrench, and safety glasses. A $25 seal kit makes the job easy.